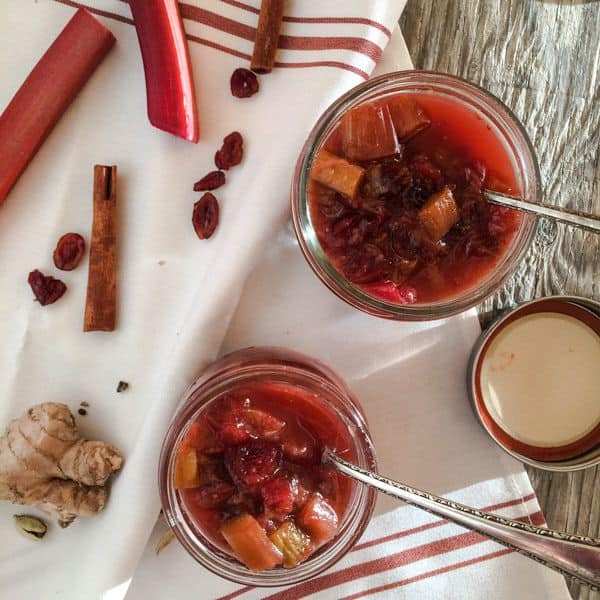
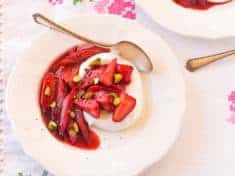
This recipe transforms little ole’ unassuming rhubarb into a delightful spiced rhubarb cranberry chutney. Simply simmer chunks of the tart stalks in hot sweet and sour honey syrup, adding dried cranberries for rosy pink color, plus cinnamon, ginger, cardamom, and a pinch of red pepper for vivid yet gentle spiciness. Amazing.
When someone says rhubarb, you first think pie, right? Boy does rhubarb make good pie! In some parts they even call rhubarb pieplant, since pie is what we usually make with rhubarb. Let’s step out of the pie box and into the sweet tangy spicy world of chutney.
Click here to PIN Rhubarb Cranberry Chutney.
Chutney is much faster and easier to make than pie. About 40 minutes from start to finish and you’ve made a delicious relish to pair with Indian curries and other savory dishes. Tart-sweet-spicy rhubarb chutney makes a delicious condiment for burgers, and we love it spread like jam on toast with almond butter. With cheese and crackers, spiced rhubarb chutney absolutely sparkles!
Try drizzling your rhubarb spicy chutney into lentil soup. It’s also stellar with sautéed greens, like kale, chard and spinach.
Rhubarb Cranberry Honey Chutney recipe notes:
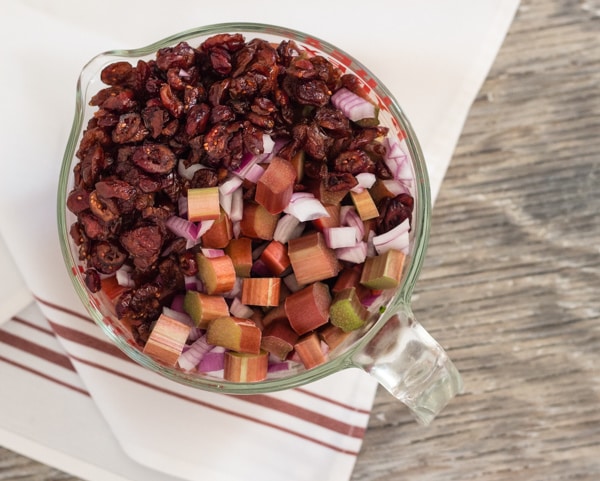
- When you add the rhubarb and dried cranberries to the hot spiced honey and vinegar base, resist the urge to add water—in short time the rhubarb breaks down, making plenty of liquid.
- Try not to cook your chutney more than four minutes as it gets mushy. Not a bad thing flavor-wise, it’s just that tender rhubarb chunks look better. If you are going to preserve your chutney by canning, the rhubarb breaks down anyway.
- You can use either ground cardamom or the crushed seeds of cardamom pods. No doubt about it, the freshly crushed seeds have much more aromatic sexy cardamom flavor–cardamom seeds begin to lose their essential oil the minute they’re ground.
- Pair your rhubarb chutney with this curried chard and chickpea dish.
- Flexitarians will enjoy this spicy chutney with meat, chicken, and fish.
- This recipe is adapted from a recipe in Bon Appétit magazine, April 1994 issue.
Just so you know, some of the links below are affiliates. When you purchase products via my links, it doesn’t cost you anything and I earn a tiny commission, which helps me continue to provide free content here on Letty’s Kitchen. Thank you!
How to can rhubarb cranberry chutney:
Since this chutney is an acid food, these are directions for water bath canning.
- You will need canning jars, canning seals and rings, a jar lifter and canning funnel, plus a water bath canner or large pot with a rack in the bottom. (I use my pasta pot with its insert as the rack.)
- Fill the canner or pot about one third full of water. Heat water until hot, not boiling.
- Wash the jars and keep warm until ready to fill. I dip the jars in the pot of canning water and use a jar lifter to pull them out just before filling with the chutney. Have your lids and rings warm and ready too.
- Place a canning funnel over the jar and ladle in the chutney, leaving ½ inch of head space. Wipe the rim of the jar clean with a damp tea towel or paper towel.
- Place lids and rings on jars. Tighten the rings just finger tight.
- Using a jar lifter, place jars on the rack in the canner. The rack keeps the jars off the bottom and also keeps them from hitting each other. The jars must not sit directly on the bottom of the pot or touch each other. I sit my jars on the insert of my pasta pot, leaving a little space between each jar. (I can fit 7 (1/2-pint) jars in at a time so I have to repeat the process for the last 2 jars. A water bath canner would fit them all.)
- Make sure the jars stay covered by 2 inches of water during the canning time. Cover the pot and bring to a full boil. Don’t start the time until the water is boiling.
- Keep at a rolling boil for 20 minutes. Since I live at 7000 feet above sea level, I need to adjust time, adding an extra 15 minutes. Read here about altitude adjustments for canning.
- When the canning time is up, use a jar lifter to carefully remove the jars. Set upright in a draft-free area to cool, on a wooden board or a kitchen towel. Leave 1 to 2 inches of space in between so air can circulate.
- As the jars cool, the flat lid will seal–listen for the pingypopping sound and watch for the slight dome to pull down.
- That’s when you know your chutney canning project is a success! Yay! (If you find a jar that did not seal, simply put the jar in the fridge and use the chutney within 2 weeks.)
Thanks for being here. To get my latest recipe posts and exclusive monthly newsletters, subscribe here. (I hate Spam too and will never share your email with anyone.)
- Follow me on Instagram! It’s my favorite!
- Peruse my Pinterest boards for more vegetarian recipe ideas.
- Find daily vegetarian and healthy living ideas on my Facebook page.
- Another way to follow my blog is through Bloglovin
PS If you make this recipe and love it, please consider leaving a blog post comment. Your comments help other readers learn more about the recipe.
This post contains affiliate links. When you purchase products via my links, it doesn’t cost you anything and I earn a tiny commission, which helps me continue to provide free content here on Letty’s Kitchen. Thank you!!

Rhubarb Cranberry Honey Chutney
Ingredients
- ¾ cup honey
- ½ cup red wine vinegar
- 1 tablespoon balsamic vinegar, optional
- 2 cinnamon sticks
- 1 ½ tablespoons grated fresh ginger
- 1 ½ teaspoons orange or grapefruit zest
- ½ teaspoon ground cardamom, or seeds of 3 cardamom pods, crushed
- ¼ teaspoon red pepper flakes
- ¾ cup dried cranberries
- ¼ cup chopped red onions
- 4 ½ cups coarsely chopped rhubarb (from 1 3/4 pounds rhubarb)
Instructions
- Stir the honey, vinegar, cinnamon, ginger, citrus zest, cardamom, and red pepper flakes in a saucepan over medium heat until the mixture boils.
- Add cranberries and red onions; bring to boil. Stir in rhubarb. Resist the urge to add any extra liquid--in a few minutes the rhubarb will release it's juice. Reduce heat to low and simmer until rhubarb is tender but not falling apart, about 4 minutes.
- Cool to room temperature. Discard cinnamon.
- Serve warm, or cover and refrigerate chutney until cold. It will keep about 2 weeks refrigerated. OR--can your chutney to enjoy later or give as gifts!


Thank you Letty! if i want to can this, should i make the syrup and add all but the rhubarb, then add when canning? I boil jars about 20 minutes here at altitude…Thanks, want to save this wonderful treat for winter!!! · 27 June, 2016
Megan, that’s a perfect solution! Let me know how the rhubarb keeps shape. I want to can some of this chutney too, but might not get to it. I just stashed a few jars in the freezer to enjoy later! · 27 June, 2016
Love Rhubarb and love this chutney! If I can find some rhubarb, I’ll be giving it a try. Thanks! · 27 June, 2016
Thanks MJ. Here in the mountains rhubarb is coming on strong, but may be over in warmer climes. · 27 June, 2016
We made this last night during dinner prep. It was very easy and really delicious. I was skeptical about cooking for only 4 minutes, but the texture was great. Thank you! · 22 June, 2017
Thank you Laurie. I’m glad you trusted the time. It gets mushy if cooked too long. · 22 June, 2017
First attempt at making chutney and this was a huge winner. Very flavourful! · 18 June, 2023
Thank you Peter. I so happy you like the chutney! · 19 June, 2023